Today is National Bread Day so here on The Chocolate Cult we are back with Recipe #2 using Rhodes BakeNServ Sweet Dough. Last time we used semi-sweet chocolate chips, cream cheese, and cinnamon so how with this second recipe differ? You'll need to keep reading to find out! The most challenging part of testing out these Rhodes products was that my area simply does not carry very many of their dozens and dozens of items. I got this product on the way back from visiting my parents out in Iowa earlier in 2018. I used a cooler of ice to transport each Rhodes product and none were damaged. Ice and cooler for the win! Any ingredients I used for this recipe which I got free from another brand I will mark with *; otherwise all ingredients were ones I had on hand. I got the bag of Sweet Dough using a coupon for a free product that was sent to my by Rhodes BakeNServ in exchange for testing out their products and sharing the results with all of you; no other form of compensation was received.
Some blog seem to only share their successes when it comes to recipes but that feel fake to me. I share everything that I attempt with you in the hopes that we can learn together. Perhaps you've tackled a similar issue and your comment will help me and others. This attempt was somewhere between success (tastes great) and failure (weird looking inside).
Chocolate Swirl Bread
By TammyJo Eckhart, PhD
Ingredients:
1 Loaf *Rhodes Bake'nServ Sweet Dough
1 Jar Hershey's Chocolate Spread
Directions:
1. Thaw dough load according to directions on the bag.
2. On a lightly floured surface, roll out the dough until it is a rectangle roughly 9 X 17 inches.
3. Spread the chocolate on the surface of the rolled out dough leaving space around the edges so that the dough can stick to itself.
4. Roll along the shorter side until you have a loaf. Tuck in the edges around the center.
5. Grease and flour a bread pan. Use a cake lifter to transfer the load to a bread pan seam side down. (Should I have put it seam side up?)
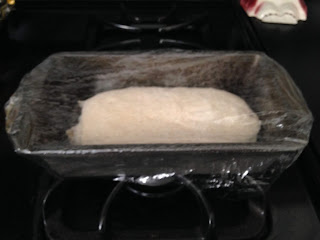
6. Let rise until it fills the full pan and looks like a loaf of bread.
7. Preheat oven to 350°F then place bread into the center of oven. Bake for 20-25 minutes depending on how dark you like your bread.
8. Let pan and loaf cool on wire rack for at least half an hour before turning out the loaf so the bread is firmer.
9. Once completely cooled, cut the bread into slices and eat.
Here's the issue. An air bubble clearly rose in the top half of my bread but the lower layers didn't rise. They did bake, nothing dough about this bread. It tasted great but it did not look like I wanted it to. The end pieces were fuller, not such a big air bubble probably because I tucked in the sides to close the center.
Anyone have suggestions?


Comments
Post a Comment
Do NOT leave a url link in your comments. Leaving such links will result in deletion of your comment. If you have a product you would like featured on The Chocolate Cult contact us and we will tell you how. We charge nothing beyond the product to be tested and written about.
Comments containing insults to other commenters, to companies or brands, or which attempt to insult or denigrate any group of people may be removed by the website editor. Think about how you would like to be treated and treat everyone with respect on The Chocolate Cult.